Notebook Tutorial
OK I am giving a tutorial a go. NO GIGGLING! OK a little giggling might be fun! hehehehe So you all probably already know how to do this but I added a few tricks I have learned along the way - hope this helps.
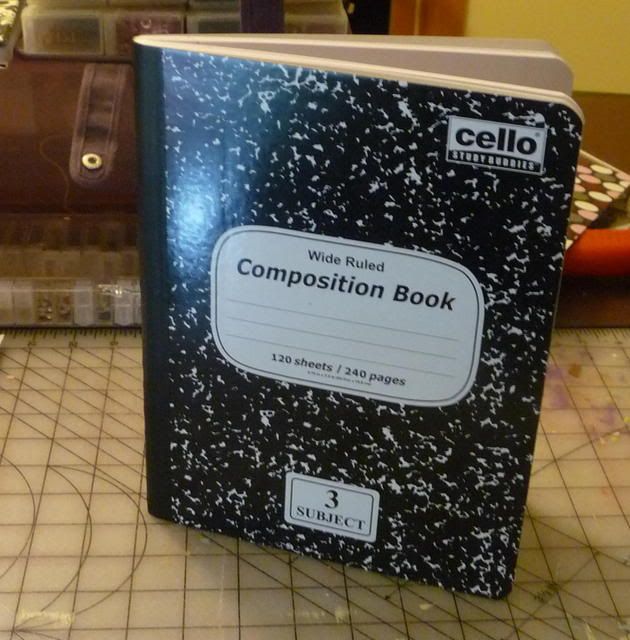
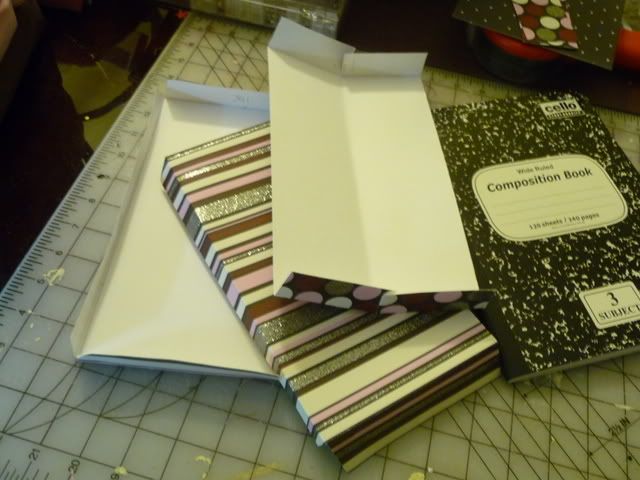
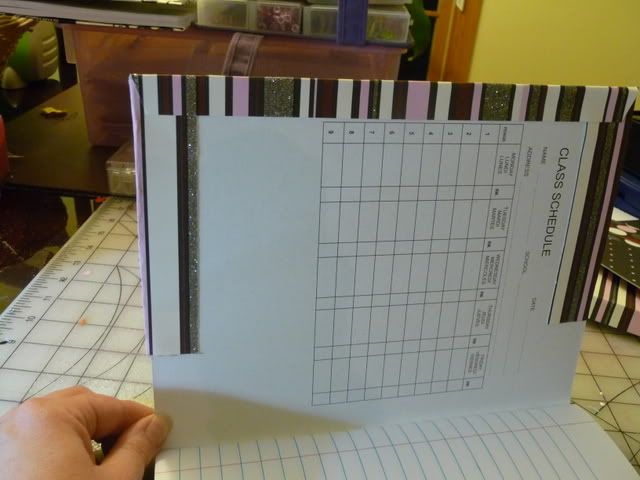
This is the notebook that I am covering. I get these for 50 cents each at Target during school starting season!
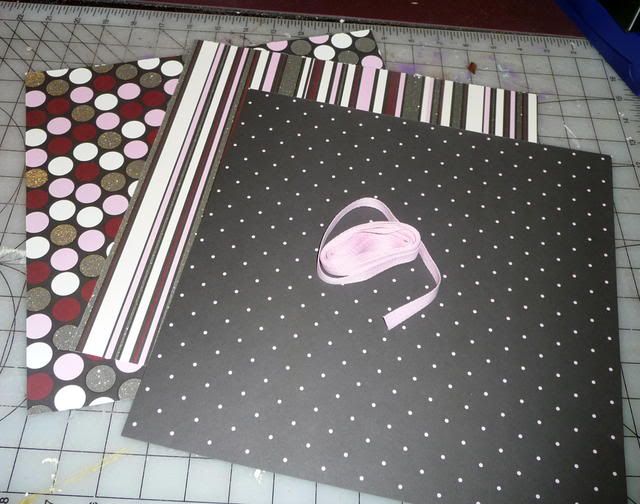
Pick 3 12x12 pieces of paper - One for the front cover, one for the binding and one for the lining. I also pick some matching ribbon at least 30" (optional).
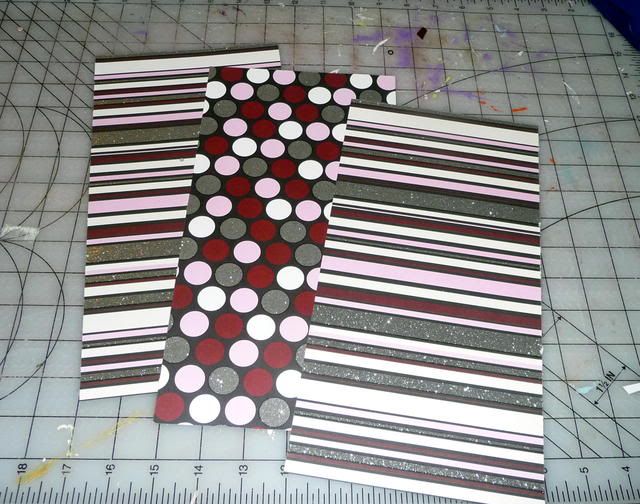
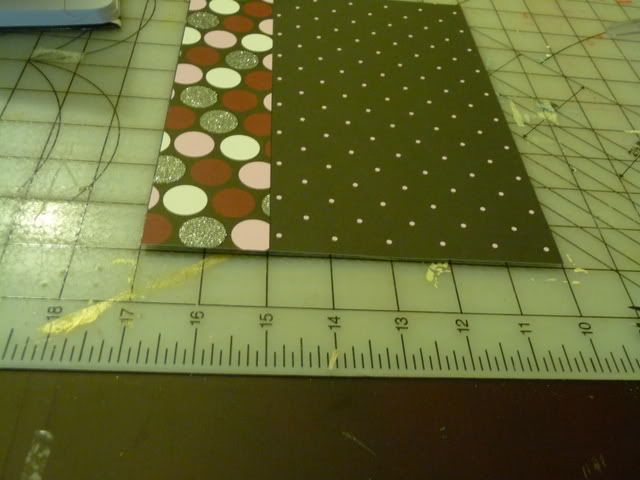
Taking the cover paper (I chose the stripes) and the binding paper (I chose the dots) Cut both pieces in half. Keep 2 cover pieces and one binding piece. You should have 3 12x6 pieces
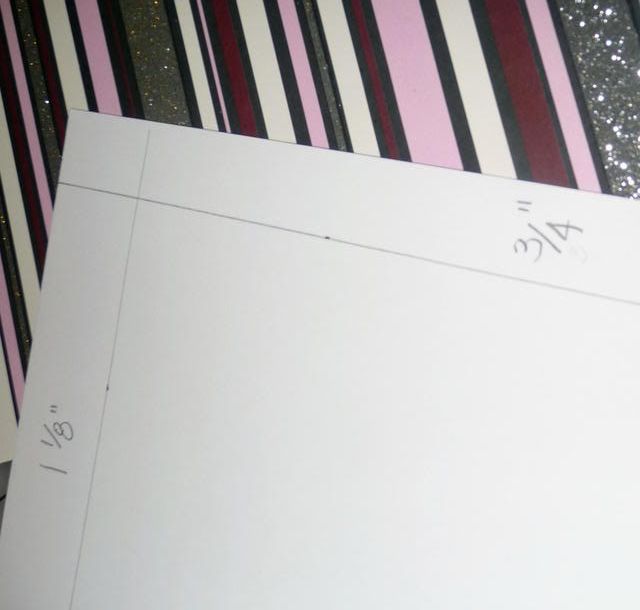
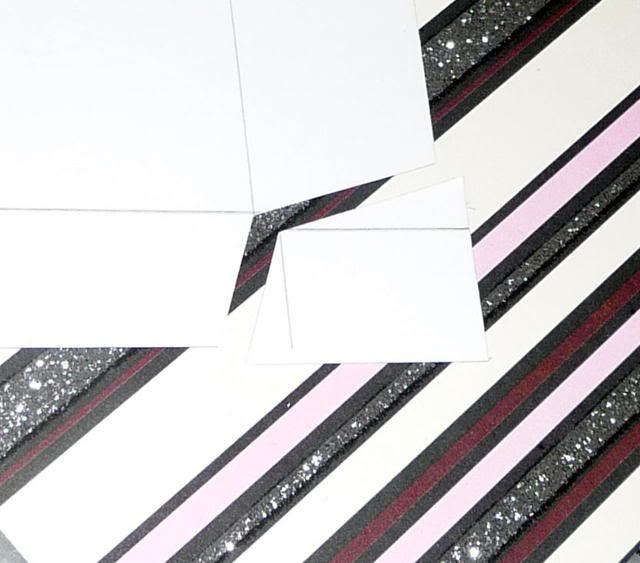
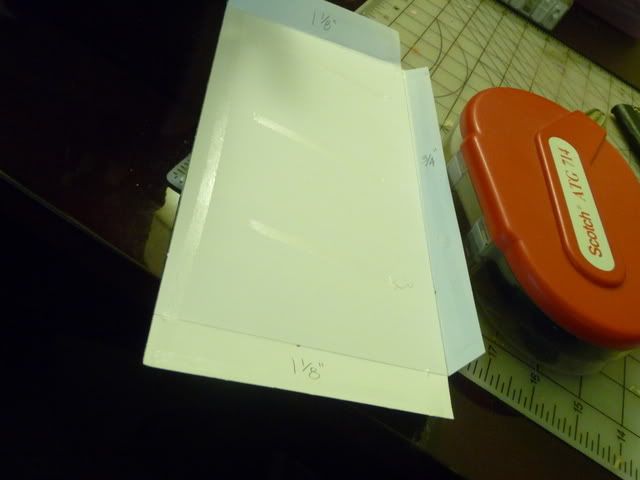
Turning over the cover paper, mark the cover pieces on the wrong side. Measure in 3/4" from the left side and make a line. Also measure 1-1/8" from the top and the bottom and make a line. Trim the top and bottom left corner pieces off cutting at an angle as shown. Repeat for the second cover.
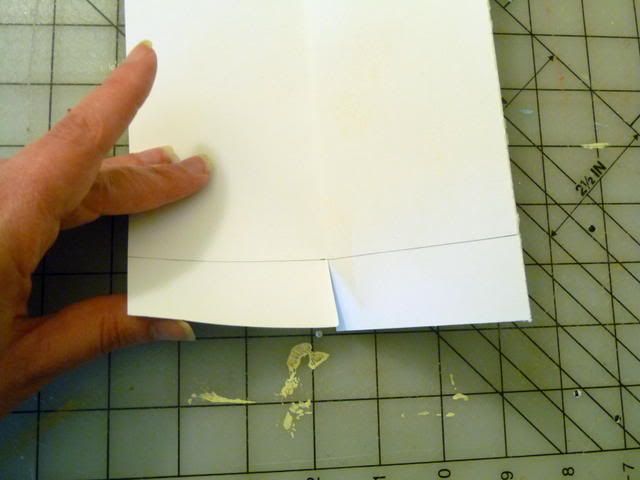
Taking the binding paper measure 1-1/8" from the top and the bottom and make a line. Fold the lining paper in half creasing gently cut along the center up to the line as shown (do both the top and the bottom)
Fold over all the lines you have drawn - no need to use a bone folder here - finger folding will do --- here are how your pieces should look
Take one of the cover pieces and tape all the way around the edges to get a good seal --- I use a Scotch tape gun but sticky strip would work as well. Put a bit of tape in the middle as well to avoid puckering. Throughout this tutorial I will emphasize taping well. It REALLY increases the life of the book.
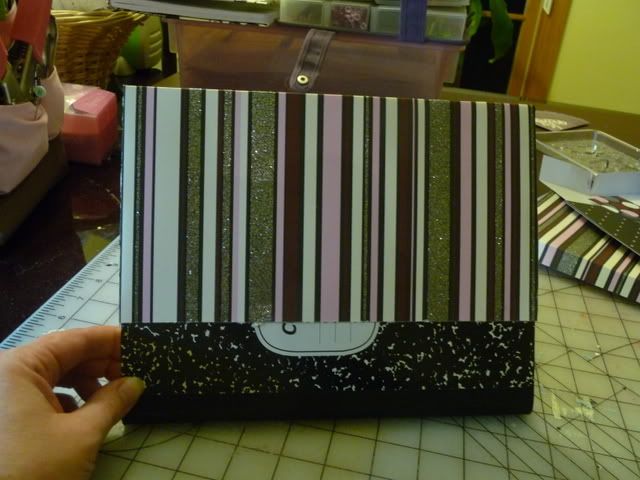
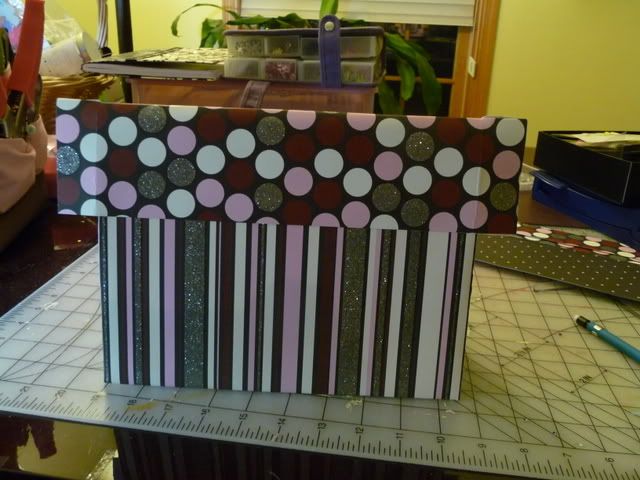
Line up the cover paper with the book using the drawn lines as a guide. I prefer to close the top and bottom first then the edge as I think it looks cleaner.
Press down the paper on the cover and make sure you dont have any puckering. Repeat on the other cover so that both front and back are covered.
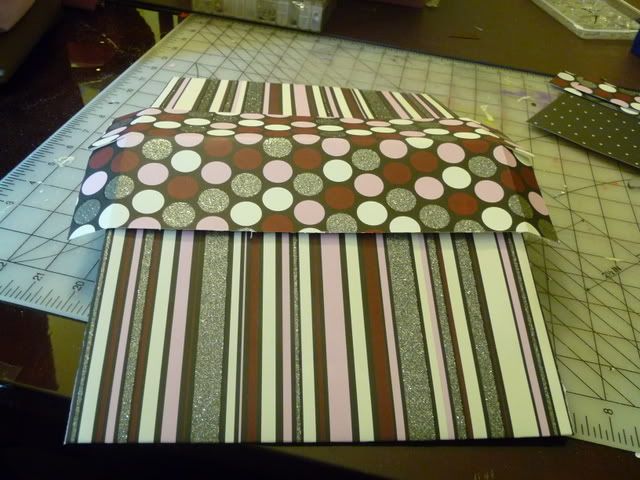
Tape up the binding paper along all edges and some in the middle.
Lay the book open flat to line it up press down one side. Then close the book and bend down the second side. This is to ensure your book closes with the binding in place.
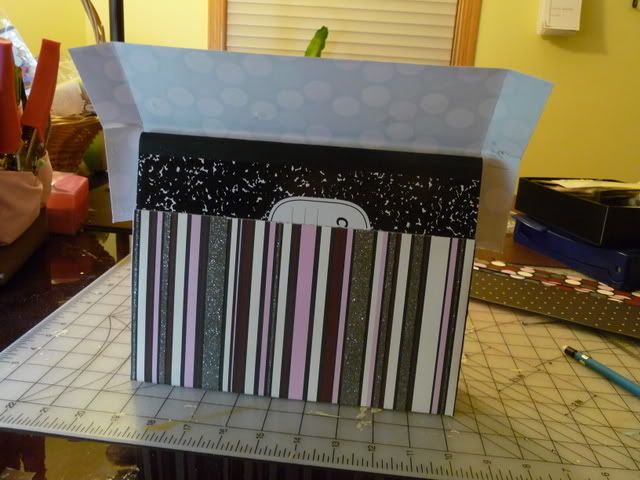
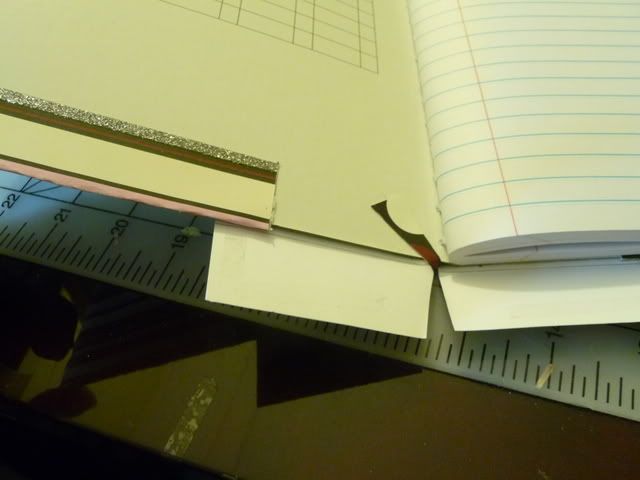
Open your book up and look at the top and bottom flaps. Trim them in to the angle shown to fit around the notebook paper - I take the little piece and glue it down because I think it looks neater but you could just remove it. Then fold the flap up to cover. Don't worry about it being perfect - you are gong to cover most of this up later. Do all 4 areas.

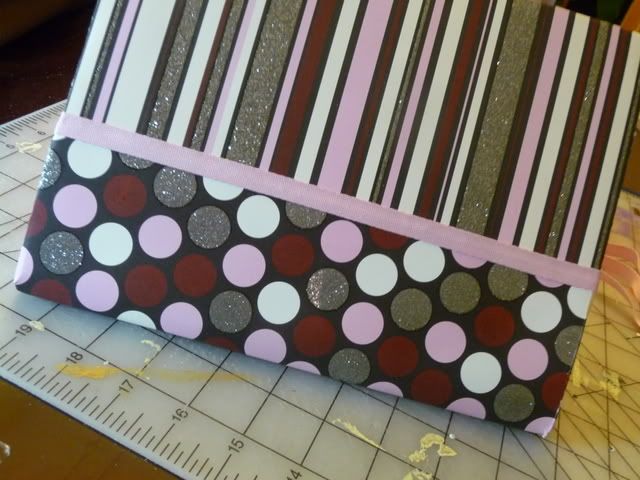
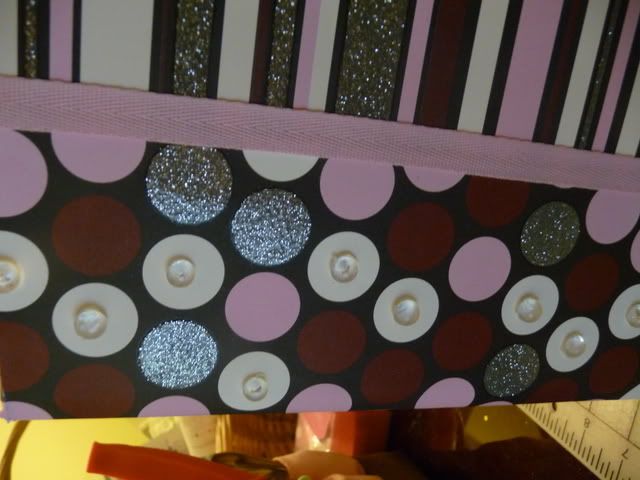
I like to add a ribbon between the binding and the cover paper -- if you are going to add it do it now --- also add any brads or other through elements now if you want them hid by the lining. I tape down (with my tape gun again!) the ribbon the whole way -- but you could leave a little not taped down to hold a pen or add a loop for a pen.
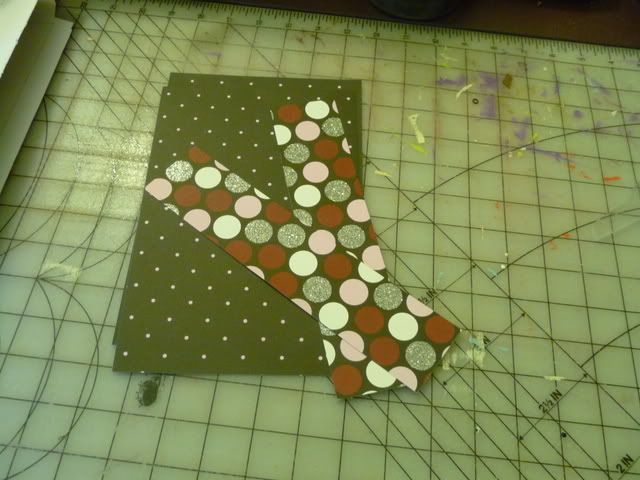
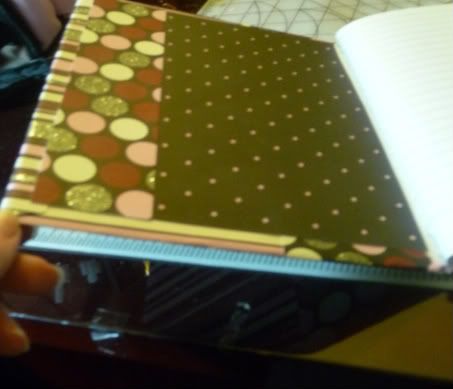
Next I cut my lining --- Trim the lining piece to 12x9 (this step is to allow you to have a nice 12x3 scrap)-- then make two pieces of 6x9 each. From the remaining (12x6) binding paper cut two 2x9 pieces.
Tape the 6x9 and the 2x9 together to form one 7x9 piece as shown. Aligning this on a grid helps. Also if you want to add a ribbon to the lining intersection now is the time as you can fold the flaps under the lining. I like the way this looks as-is so I didn't add it here.
Tape all around the edges with a couple of swipes in the middle and place the lining in -- repeat for the back.
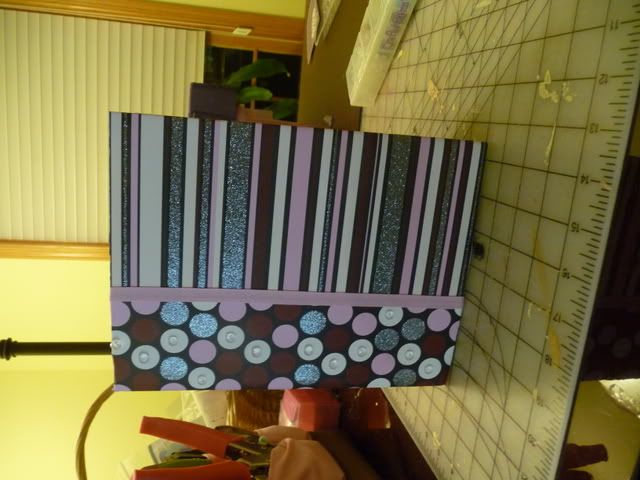
Then finish decorating and enjoy!
This is the notebook that I am covering. I get these for 50 cents each at Target during school starting season!


Pick 3 12x12 pieces of paper - One for the front cover, one for the binding and one for the lining. I also pick some matching ribbon at least 30" (optional).
Taking the cover paper (I chose the stripes) and the binding paper (I chose the dots) Cut both pieces in half. Keep 2 cover pieces and one binding piece. You should have 3 12x6 pieces

Turning over the cover paper, mark the cover pieces on the wrong side. Measure in 3/4" from the left side and make a line. Also measure 1-1/8" from the top and the bottom and make a line. Trim the top and bottom left corner pieces off cutting at an angle as shown. Repeat for the second cover.


Taking the binding paper measure 1-1/8" from the top and the bottom and make a line. Fold the lining paper in half creasing gently cut along the center up to the line as shown (do both the top and the bottom)

Fold over all the lines you have drawn - no need to use a bone folder here - finger folding will do --- here are how your pieces should look

Take one of the cover pieces and tape all the way around the edges to get a good seal --- I use a Scotch tape gun but sticky strip would work as well. Put a bit of tape in the middle as well to avoid puckering. Throughout this tutorial I will emphasize taping well. It REALLY increases the life of the book.

Line up the cover paper with the book using the drawn lines as a guide. I prefer to close the top and bottom first then the edge as I think it looks cleaner.
Press down the paper on the cover and make sure you dont have any puckering. Repeat on the other cover so that both front and back are covered.


Tape up the binding paper along all edges and some in the middle.
Lay the book open flat to line it up press down one side. Then close the book and bend down the second side. This is to ensure your book closes with the binding in place.


Open your book up and look at the top and bottom flaps. Trim them in to the angle shown to fit around the notebook paper - I take the little piece and glue it down because I think it looks neater but you could just remove it. Then fold the flap up to cover. Don't worry about it being perfect - you are gong to cover most of this up later. Do all 4 areas.


I like to add a ribbon between the binding and the cover paper -- if you are going to add it do it now --- also add any brads or other through elements now if you want them hid by the lining. I tape down (with my tape gun again!) the ribbon the whole way -- but you could leave a little not taped down to hold a pen or add a loop for a pen.

Next I cut my lining --- Trim the lining piece to 12x9 (this step is to allow you to have a nice 12x3 scrap)-- then make two pieces of 6x9 each. From the remaining (12x6) binding paper cut two 2x9 pieces.
Tape the 6x9 and the 2x9 together to form one 7x9 piece as shown. Aligning this on a grid helps. Also if you want to add a ribbon to the lining intersection now is the time as you can fold the flaps under the lining. I like the way this looks as-is so I didn't add it here.


Tape all around the edges with a couple of swipes in the middle and place the lining in -- repeat for the back.

Then finish decorating and enjoy!


Comments
(now I HAVE to get that stack! lol)
Only a little giggling on my end :) Just cause I could :)